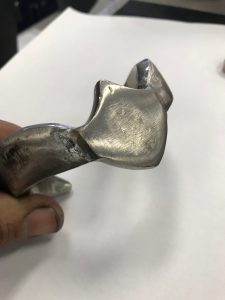
Metal Jewelry Making Project
Gift Giving – Awesome Metal Jewelry Project to Gift this Season
‘Tis the season for giving great gifts. And what could be more appreciated than a piece of custom DIY jewelry!
Don’t worry if you don’t yet know how to make jewelry. This short guide to copper jewelry making should give you the confidence to get started.
One of the easiest pieces of jewelry for a DIY project is a copper bracelet. These simple adornments have been popular throughout history both for decoration and for their special healing properties.
Copper bracelets can easily be made from readily available tools and materials, such as a length of copper tubing or a flat piece of coppersheet.
Measuring the Bracelet
To determine the size of the copper blank or tubing needed, use a tape measure or cut a paper strip fitted to the person’s arm. Add a little extra to account for the bend – between ¼-in. and 1 in. depending on how loose you want the fit. Once you’ve determined the correct size, mark the sheet or tube with permanent marker.

Cutting the Copper
The basic copper blank should be a rectangle approximately 1-2 in. wide by 6-7 in. long. The blank can be cut from copper sheet using metal shears, jewelry saw or a hacksaw. You may be able to order a custom-cut to size piece.
If you’re using copper tubing, a small pipe cutter can cut cleanly through the tube.

Filing the Metal
For copper tubing, use a metal hammer to completely flatten the ends, which will close up the tube. For all bracelet styles, use a metal file to remove any sharp edges. You can also round the corners and bevel the edges for a more attractive look. Follow up with a nail file or sandpaper to remove burrs and make it completely smooth.

Hammering the Copper
This step is called forging the copper. To soften it up before hammering, you can use a torch to anneal the piece. You may also be able to buy the copper in a pre-annealed, or “dead soft” state.
Flatten the tube or add a texture to the copper blank by hammering the piece with a ball-end hammer. If the copper bends up during this process, you can use a wooden or rawhide hammer on the reverse side to mold it back into a flat shape.
Stamping a Design
Add the decorative details before bending the bracelet into its rounded shape. You may want to add a design or a colorful patina.
Metal stamp letters or designs can be hammered into the surface to imprint a personalized message. To highlight the designs, use a permanent marker to color them in. After the marker dries, wipe off the surface with alcohol to leave dark ink in the crevices.
Be careful not to over-work the metal during this stage, which would make it hard to bend later. If that happens, you may need to heat the piece with a torch to soften it enough for bending.
Bending the Bracelet
Once you’re happy with the design, it’s time to carefully bend the bracelet into its final shape. You can use almost any round form, such as a baseball bat or else buy a bracelet bender or mandrel.
Use the wooden hammer and/or your hands to carefully bend the bracelet around the form into a rounded shape.
Protect with a Finish
Finishing the bracelet can be as simple as coating it with paste wax or polyurethane, to protect it from fingerprints and prevent the copper from turning green.
Industrial Metal Supply stocks the highest quality hobby metals, including copper, brass, aluminum, stainless steel, and music wire. We also offer tools and accessories for DIY jewelry projects. Visit one of our six convenient locations or contact us with your questions today.


